
The Ultimate Wet Shave Guide – The Only Resource You’ll Ever Need
 It’s no secret that the recent trend for men has been to grow and maintain facial hair of various lengths. Many workplaces have also relaxed in recent years on items like dress codes and expectations for personal grooming (whether written or not). As a result, shaving has gone from a daily ritual for men to occasional at best. Many men do not view shaving as an enjoyable and relaxing process, but instead an inconvenient chore.
Interestingly at the same time, many men who do shave regularly have become tired with the over-priced multi-blade cartridge razors that are sold at big box retailers and pharmacies. If you fall into the later camp, let me suggest that you investigate the traditional wet shave. With a minimal initial investment and some practice, I think you will find a process that is truly enjoyable, effective, and inexpensive in the long run.
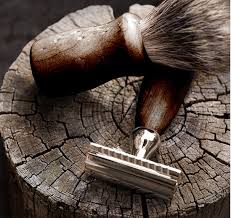
In this article I will provide a brief overview of the traditional wet shave process, and a quick look at the “tools of the trade”.
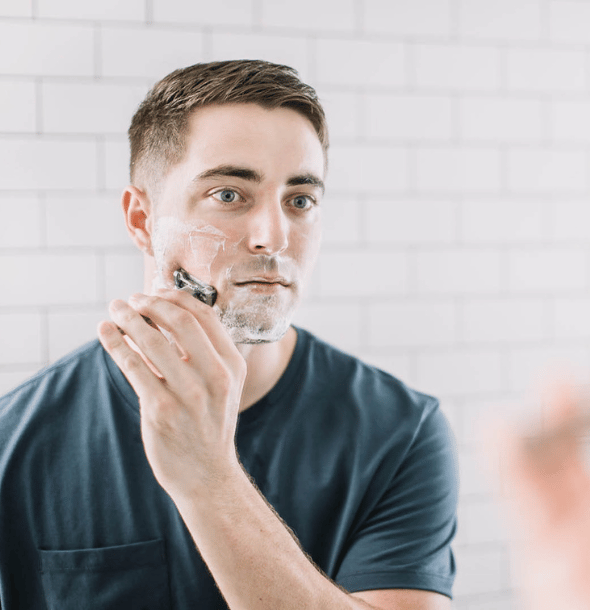
Photo Credits @onebladeshave
The Process
The process of the traditional wet shave is certainly flexible and can be tailored to suit the individual, however I generally recommend three steps:
(1) Preparation of the Skin
(2) Lather & Shave
(3) Condition the Skin
Step 1: Preparation of the Skin
Preparing your skin to shave is the first step in the traditional wet shave process, and is extremely important. It is easy to think that one could save time by simply lathering up some shave soap or cream, applying to the face, and then starting to shave. While that is certainly an option, I think you will find skipping the preparation stage will leave you with an unpleasantly painful shave, as well as possible irritation.
One option to prepare your skin to shave is simply to shower first with warm water. The warm water will open your pores and will soften the facial hair, preparing it to be reduced during the shave itself. I personally like to shave before I shower, so instead I run a wash cloth under hot tap water, and hold the hot wash cloth over my face and neck for a minute. It’s a wonderful way to start the process, and essentially accomplishes the same thing that a warm shower does.
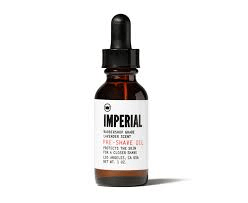
Imperial’s Pre-Shave Oil, one of many great options
After softening the facial hair, I recommend applying either a pre-shave oil or lotion to the area of the shave. The pre-shave oil or lotion is used to lubricate the hair and skin, and to help prevent tug and pull of facial hair when the blade passes over. My personal experience is that the lighter the pre-shave oil the better, as heavier oils tend to clog the blades and make each pass less effective (assuming you are using a double edge safety razor and not a straight edge). Imperial Barber Products makes a great line of shave products, including a nice, light pre-shave oil.
Step 2: Lather & Shave
Once your skin and facial hair is sufficiently prepared and you are feeling nice and relaxed, it’s time to apply a lathered shaving cream or soap to the skin. Again, there are a number of shaving creams and soaps on the market that you can choose from. I strongly suggest, however, that you pass on the shaving creams that are dispensed from an aerosol can or something similar. These types of products are nice when time is of the essence, and can be convenient while traveling, but they will typically not be as good for your skin in the long run. Aerosol based shaving creams typically contain “surfactants” (the ingredient that causes the cream to foam) that will dry out your skin.
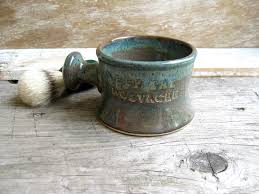
Apothecary mugs make creating a rich lather a breeze
Instead, I recommend finding a higher quality shave soap, or a cream that comes in a jar or tube. To enhance the experience, I recommend lathering the shave soap or cream using a real badger hair shave brush in a small bowl or apothecary mug. Shave brushes made from real badger hair are excellent at absorbing water and creating a rich lather that lubricates your skin and protects it from the razor blade. Real badger hair brushes are also soft to the touch, and should not result in skin irritation.
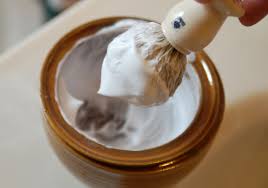
A high quality shaving cream should create a rich lather (seen with a badger hair shaving brush)
Once a rich lather is produced, and the lather is applied to your face, it’s time to shave. There are multiple options when it comes to razors, but again I have to recommend you go with a traditional razor. I personally use a double edge safety razor. It took some time to adjust from using a multi-blade cartridge razor, however it has absolutely been worth the time and effort. Double edge safety razors require an initial investment (albeit not that expensive). Razor blades can be purchased in bulk, and end up costing much less over the course of time than the multi-blade cartridge razors do.
The keys to shaving with a double edge safety razor are to:
(1) Figure out the correct angle of the blade against the surface of your skin: This typically does not take a long time to figure out. You want to find the angle that reduces the length of facial hair without also cutting the skin.
(2) Learning that using less pressure is best: Double edge safety razors are heavy for a reason. The weight of the razor itself is all you need to create enough pressure to reduce the length of your facial hair.
(3) Obtaining a close shave takes multiple passes: Note I have used the term “reduce the length of your facial hair” more than once. This is because the point of double edge safety razors are just that, to reduce the length of hair with each pass (and not to cut the hair down to skin level at one time like many multi-blade cartridge razors attempt to do). Although obtaining a close shave takes a bit more time, this is a good thing for your skin! Which brings me to my last key point:
(4) Learn the direction of the “grain” of your facial hair: The first pass you make should be in the direction of the “grain” (i.e. the direction that your hair grows). You can then follow with passes that are perpendicular to the grain, and if you want an extremely close shave, can even make a pass against the grain.
Step 3: Post-shave Conditioning/Moisturizing
Once you are done shaving, don’t stop there and go about your day. I recommend taking some additional time to tone the skin, as well as apply a moisturizer.
Once the shave is complete, it’s possible that you have a small cut or two that you will want to stop bleeding. There are a number of ways you can accomplish this. Alum blocks are one popular option, and they can be purchased from many drug stores or shaving suppliers. By simply rubbing an alum block over the area of the cut, you will constrict the blood vessels in the skin and therefore stop bleeding. There are also liquid skin toners that have the same effect. My personal choice is to first apply cold water to close and constrict my pores. I then follow with an application of witch hazel, a natural plant-based toner that cleans and further closes your pores.
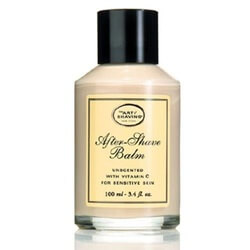
Quality After-Shave Balm by the Art of Shaving
Finally, when you are ready to wrap up (either after toning your skin or a subsequent shower), I recommend applying a moisturizer to the skin. There are a ton of options when it comes to facial moisturizers. Many shaving companies specifically sell aftershave lotions or gels. Many of these are scented as well. My personal choice is to apply a light moisturizing lotion with SPF 15 that is unscented. This provides multiple benefits in that the skin is moisturized and protected from the harmful UV rays from the sun. I choose an unscented lotion because I prefer to wear a light application of cologne, and don’t want a scented aftershave to compete with the scent of my cologne.
The Tools
Now that I’ve gone over the process of the traditional wet shave, here is a look at the primary tools that you will need to pull it off well.
Shaving Brush
In recent years most men (myself included) learned to lather up using shaving cream dispensed from an aerosol can. It is understandable why, as these shaving creams are cheap, easy to purchase (available at corner drug stores and big box retailers), convenient to use (just push a button and you are ready to go!) The traditional wet shave, however, involves lathering a higher quality shave cream or soap that is also better for your skin. These shave creams and soaps are not dispensed by an aerosol can, and you have to work to create the rich lathter that will condition your skin and lubricate against the razor blade. The best way to do so is using a shaving brush. Just like everything else, shaving brushes come in all shapes and sizes. Consensus is that the best shaving brushes are made from a natural badger or boar hair:
Boar Hair: Boar hair brushes are widely known as the best entry-level shave brush material. Boar hair brushes will do a better job of retaining moisture than a synthetic brush, and will be priced very reasonably. The downside to boar hair is that they are typically brittle and prone to breaking with too much pressure. Boar hair brushes are typically not as comfortable on the skin as badger hair. Keep in mind, as with everything, you may not find this to be the case. There are many traditional wet shavers out there that swear by boars hair brushes.
Badger Hair: Badger hair is a truly excellent shave brush material. The hair itself is known for retaining moisture which is key when building up a nice, foamy lather. Badger hair is also typically more flexible and feel softer to the touch. Badger hair is generally available in three grades (in order of quality): pure badger hair, best badger hair, and silvertip badger hair. It is also becoming increasingly common to find shave brushes that are composed of a combination of the three grades. This practice allows for the performance of silvertip badger hair, with a reduced cost to the owner.
Personally, I recommend starting out with a pure badger hair shave brush, at the lower end of the cost spectrum. Once you have practiced for a while, and are fully converted to the classic wet shave, you can invest in a higher quality brush with a higher quality badger hair. A higher quality brush can truly be an heirloom, and if well cared for can be passed down to a younger generation. Just take a look at this beauty:
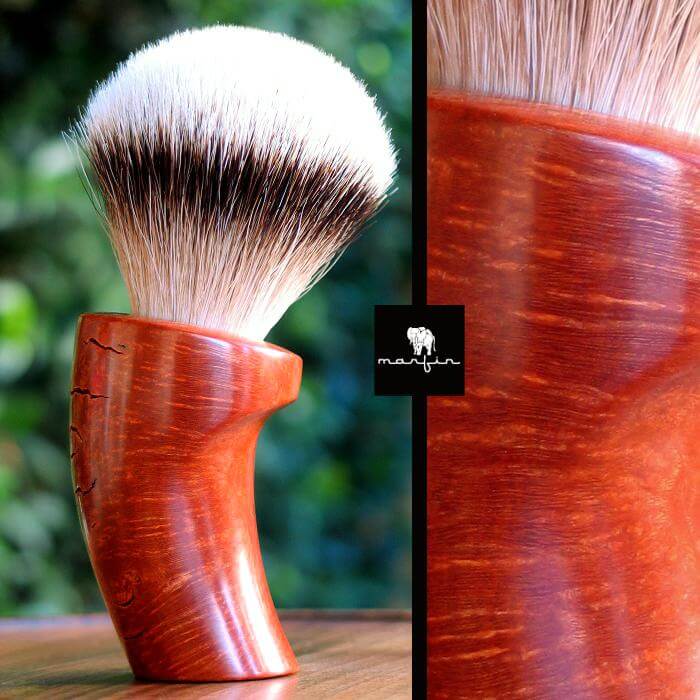
A Marfin Hand-carved Shave Brush
Razor
The most important tool of the classic wet shave is the razor, naturally. Traditionally, the razor would be one of the following:
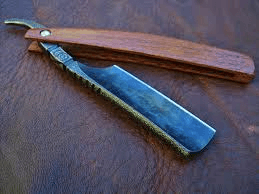
A classic straight razor
Classic Straight Razor: The classic straight razor is comprised of a single razor blade and handle. The blade typically folds into the handle (like a pocket knife) for safety during storage. A classic wet shave with a straight razor is believed to provide the most comfortable and closest shave possible. A classic straight razor often requires a higher initial investment, however it never needs to be replaced with simple care and maintenance. The owner simply needs to have the razor blade sharpened periodically. The downside is that shaving with a straight razor requires time, caution, and skill. Shaving with a classic straight razor is not something to be done quickly, and it is truly a hobby as opposed to a daily chore.

Merkur Doube-Edge Safety Razors
Double Edge Safety Razor: A double edge safety razor consists of two separate parts, the razor handle, and the razor blade. The handle typically unscrews, allowing for the user to remove and replace the blade easily. There is an initial investment in the razor handle itself, and a regular cost for razor blades. The cost of razor blades is significantly less than the cost for multi-blade cartridge razors however. Maintenance conists of cleaning the handle periodically and changing the razor blades.
My personal recommendation would be to start with the double edge safety razor, for obvious reasons. Starting with a classic straight razor would be like jumping on a two wheel bike and heading downhill before you ever spent time learning to ride with training wheels (i.e. there will be a lot of unnecessary pain in the learning process!) I have found such enjoyment out of using my double edge safety razor, and the results have been so fantastic, that I do not anticipate trading up to a classic straigh razor in the future.
As stated above, when using a double edge safety razor, there are two components to consider:
The Handle: There are many differnt size handles on the market. The only way to find out what is right for you is to hold them in your hands and try them out. I currently use a long handle Merkur razor. The length of the handle is very similar to that of a cartridge razor, and is an excellent model to start out with when making the transition to the classic wet shave. The traditional wet shave razor is shorter and heavier however.
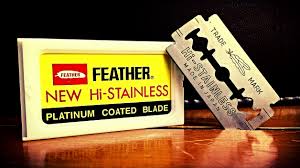
Feather Stainless Steel Razor Blades
Razor Blades: Again, there are many options on the market, and you will have to try a number of different models out before finding what works best for you. Many companies that sell traditional wet shave products offer sample packs with multiple brands, that make finding the right blade easier and more cost effective.
Finding the right combination of tools, products, and method takes time. Once you find the combination though, you will never look back!
Summary

James Bond enjoys a classic wet shave in Skyfall
One of the things that sets us as men apart from women is facial hair… and one of the long-standing traditions that men have taken part in is shaving. Wit a small initial investment, and some practice, I think you will find how enjoyable the process of shaving is. I have made the transition to a traditional wet shave with a double edge safety razor and I haven’t looked back. I honestly look forward to my time shaving every morning. It has become a relaxing and enjoyable experience, and gives me time to meditate and plan for the day ahead. I hope you find this primer to the classic wet shave helpful. If you already partake in the classic wet shave daily, please share any additional tips you have on either technique or products in the comments below.
Wet shaving with a brush and mug of soap is very delightful compared to the canned alternatives.
One splashes some hot water on the face, uses the same to lather up the brush with soap, apply liberally where needed.
I use a twin-blade disposable razor from *ilette, not quote brave enough for a straight just yet.
One can literally feel and hear the bristles of the beard being clear-cut in the first passes.
One should rinse the head frequently in the sink as beard cuttings will clog the space between the twin blades and will dramatically reduce the shaving efficiency.
The added skin lubricants from the shaving soap makes cross and back cuts painless and almost zen-like as one can literally chase the beard down by the sound of the razor cutting. The same lubricants make it easy for a wetted hand to rub back and forth to find missed patches.
Like the article says, post-shave with some lotion to restore your newly close-shaved skin.