
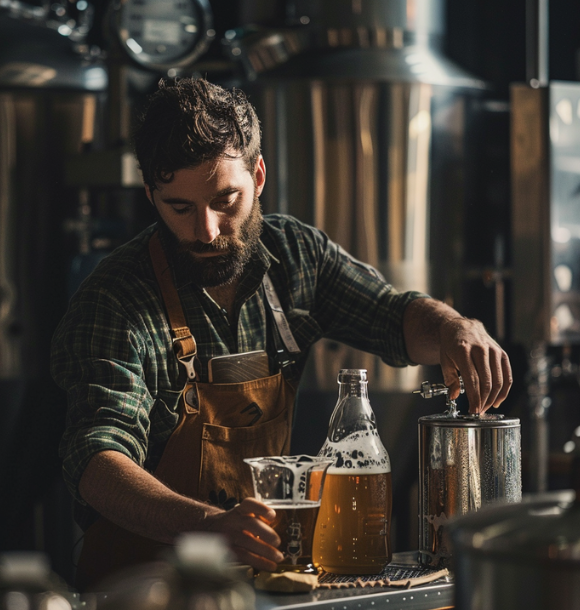
Homebrewing Basics for Beginners
Homebrewing, the process of brewing beer at home, has become increasingly popular among beer enthusiasts. It offers a range of benefits and allows beginners to explore their creativity and experiment with different flavors and styles. Here is a breakdown of the basics for beginners to get started with homebrewing.

Benefits of Homebrewing:
| 1. Cost-effectiveness: | Brewing your own beer can be more affordable in the long run compared to buying commercial beers. |
| 2. Customization: | Homebrewing gives you the freedom to customize your beer by choosing the ingredients and flavors according to your preference. |
| 3. Educational Experience: | Homebrewing provides a valuable opportunity to learn about the brewing process, ingredients, and the science behind beer production. |
Types of Homebrewing:
| 1. Extract Brewing: | This method involves using malt extract as a base and adding hops and other ingredients to create the desired flavor profile. |
| 2. All-Grain Brewing: | All-grain brewing involves starting from scratch with malted grains and going through the mashing process to extract sugars that yeast will ferment into alcohol. |
Essential Equipment for Homebrewing:
To get started with homebrewing, you will need a few key equipment:
| 1. Fermenter: | A container where the fermentation process takes place. |
| 2. Airlock: | Used to allow gases to escape during fermentation while preventing oxygen from entering. |
| 3. Brewing Kettle: | A large pot for boiling the ingredients. |
| 4. Thermometer: | To monitor and control the temperature throughout the brewing process. |
| 5. Hydrometer: | Used to measure the specific gravity of the beer to determine alcohol content. |
Ingredients for Homebrewing:
The main ingredients for homebrewing include:
| 1. Malted Barley: | The primary source of sugars for fermentation. |
| 2. Hops: | Adds bitterness, flavor, and aroma to the beer. |
| 3. Yeast: | Ferments the sugars into alcohol and carbon dioxide. |
| 4. Water: | The foundation of beer and affects the overall taste and quality. |
The Homebrewing Process:
- Sanitization: Proper sanitization of all equipment is crucial to prevent contamination and ensure a clean fermentation environment.
- Mashing: Mixing malted grains with hot water to extract sugars and create a sweet liquid called wort.
- Boiling: Boiling the wort and adding hops for bitterness and flavor.
- Fermentation: Adding yeast to the cooled wort and allowing it to ferment for the desired time.
- Bottling and Carbonation: Transferring the fermented beer to bottles, adding a small amount of sugar, and allowing it to carbonate.
Troubleshooting Common Homebrewing Issues:
Identifying and resolving common issues such as off-flavors, infections, and fermentation problems.
Tips for Successful Homebrewing:
Use fresh ingredients, maintain proper sanitation, control fermentation temperature, and be patient throughout the brewing process.
By understanding these basics, beginners can confidently embark on their homebrewing journey and enjoy the rewarding experience of creating their own delicious and unique beers.
Key Takeaways:
- Homebrewing is cost-effective: Brewing your own beer at home can save you money compared to buying commercially produced beer.
- Customization is a benefit of homebrewing: Homebrewing allows you to create beers that suit your personal taste preferences and experiment with different ingredients and flavors.
- Homebrewing provides an educational experience: The process of homebrewing teaches you about the science and art behind beer production, enhancing your understanding and appreciation for the craft.
Benefits of Homebrewing
Discover the incredible perks of homebrewing in this enlightening section. Unleash your inner brewmaster and indulge in the extensive benefits that this craft offers. From cost-effectiveness to the freedom of customization, and even the educational experience it provides, we’ll uncover the secrets behind the popularity of homebrewing. So grab your ingredients and get ready to embark on a flavorful journey that will leave you with a newfound appreciation for the art of brewing.
1. Cost-effectiveness
Cost-effectiveness is a significant advantage of homebrewing. By brewing your own beer at home, you can save money compared to purchasing commercial beers. Here are some reasons why homebrewing is cost-effective:
- Ingredients: The primary elements for homebrewing, including malted barley, hops, yeast, and water, can be bought in bulk at a lower cost. Buying these ingredients in large quantities allows for long-term savings.
- Quantity: When you brew your own beer, you have the ability to control the batch size. Brewing larger quantities reduces the cost per bottle. This is particularly beneficial if you regularly consume beer or enjoy sharing it with others.
- Customization: Homebrewing enables you to create beer that aligns with your taste preferences. You can experiment with various flavors, styles, and ingredients, eliminating the need to purchase expensive craft beers.
- Eliminating the middleman: By brewing your own beer, you avoid the expenses associated with distribution, marketing, and retail markup. This significantly decreases the overall cost of each bottle of beer.
- Reusability: Homebrewing equipment, such as fermenters, airlocks, and brewing kettles, can be reused for multiple batches. This eliminates the need to constantly purchase new equipment, further enhancing the cost-effectiveness of homebrewing.
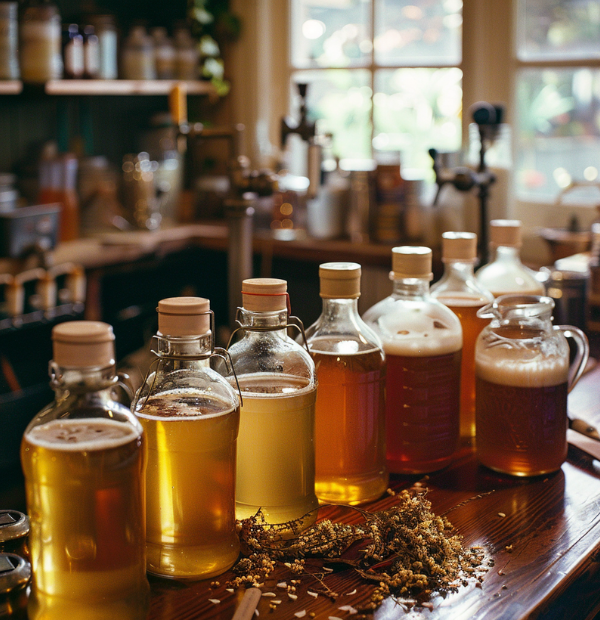
2. Customization
Customization plays a significant role in homebrewing, allowing brewers to create unique and personalized beers. There are several ways in which customization is incorporated in the homebrewing process:
- Recipe development: Homebrewers have the freedom to experiment with various ingredients and flavors, handpicking specific varieties of malted barley, hops, yeast, and water to achieve their desired flavor profiles and aromas.
- Adjuncts and flavors: Homebrewers can further customize their beers by adding fruits, spices, or even coffee, resulting in one-of-a-kind flavor combinations.
- Alcohol content: Brewers have the ability to control the amount of fermentable sugars in the wort, which directly impacts the final alcohol content. This allows for the creation of beers with different levels of strength.
- Carbonation and conditioning: Homebrewers possess control over the carbonation level in their beer. They can choose to naturally carbonate the beer through the addition of priming sugars or utilize carbonation systems to force carbonate, achieving their desired level of carbonation.
- Label design: Homebrewers have the opportunity to let their creativity shine by designing their own labels. This personal touch adds visual appeal to their creations.
In summary, customization empowers homebrewers to tailor every aspect of their beer-making journey, resulting in truly original and personalized brews.
3. Educational Experience
The educational experience of homebrewing is enriching and rewarding. It allows you to learn new skills and gain knowledge about the brewing process and the science behind it.
- Hands-on Learning: Homebrewing provides a practical educational experience that can be applied in various aspects of life. You gain these skills through mashing, boiling, fermenting, and bottling.
- Understanding Ingredients: Homebrewing allows you to explore different ingredients like malted barley, hops, yeast, and water. By learning about their characteristics and flavors, you enhance your understanding of their contribution to the final product.
- Experimentation and Creativity: Homebrewing fosters an educational experience that encourages you to create unique beer recipes by playing with different ingredients and brewing techniques. This nurtures innovation and personal expression.
- istorical and Cultural Appreciation: Homebrewing can deepen your appreciation for the history and cultural significance of beer. Exploring traditional brewing methods and beer styles helps you understand different cultures and their brewing traditions.
- Problem-solving Skills: Homebrewing involves troubleshooting and problem-solving throughout the brewing process, providing an educational experience that develops critical thinking skills. It helps you overcome challenges to achieve desired results.
The educational experience of homebrewing goes beyond these points and provides a foundation for continuous learning and improvement in the craft. As you refine your skills, you will gain a deeper appreciation for the art and science of brewing.
Types of Homebrewing
From the Reference Data, let’s jump into the exciting world of homebrewing, specifically exploring the different types that beginners can try. Get ready for a flavorful adventure as we delve into two sub-sections: extract brewing and all-grain brewing. Discover the unique techniques and ingredients involved in each method, allowing you to experiment and find your brewing style. So grab your brewing gear, because we’re about to dive into the delicious world of homebrewing!
1. Extract Brewing

Extract brewing is a popular method of homebrewing that is ideal for beginners. It simplifies the brewing process, making it easier to create delicious beers at home. The steps involved in extract brewing are:
- Clean and sanitize brewing equipment to ensure a sterile environment.
- Heat the required amount of water in a brewing kettle to the specified temperature.
- Stir malt extract into hot water until fully dissolved, providing fermentation sugars.
- Bring the mixture to a boil and add hops as instructed for bitterness, flavor, and aroma.
- After boiling, cool the liquid using an ice bath or wort chiller.
- Transfer the cooled liquid, called wort, to a fermenter, leaving sediment and hop residue behind.
- Add properly hydrated and activated yeast to the fermenter.
- Cover the fermenter with an airlock to allow carbon dioxide to escape while preventing contamination.
- Allow fermentation to occur for about one to two weeks in a cool, dark place.
- Transfer the beer to bottles or kegs after fermentation, adding priming sugar for natural carbonation.
- Seal the bottles or kegs and let them sit at room temperature for a specific time to carbonate.
- Refrigerate the beer to chill and mature before enjoying.
By following these steps, you can successfully enjoy the process of extract brewing and create your own unique and flavorful beers.
2. All-Grain Brewing
All-grain brewing is a method that uses whole grains to create beer wort. It offers control and customization over the final product, resulting in unique flavors and characteristics.
An all-grain brewing setup requires the following components:
| 1. Mash Tun: | A vessel for combining crushed grains with hot water to convert starches into fermentable sugars. |
| 2. Hot Liquor Tank: | A container for holding water heated to the desired temperature for mashing. |
| 3. Brew Kettle: | A large pot for boiling the wort and adding hops. |
| 4. Wort Chiller: | A device for rapidly cooling the boiled wort to a suitable temperature for yeast fermentation. |
The all-grain brewing process involves these steps:
- Mashing: Mixing crushed grains with hot water in the mash tun to convert starches into sugars.
- Sparging: Gently spraying hot water over the grains to extract the sugars and create the wort.
- Boiling: Transferring the wort to the brew kettle and boiling it with added hops for bitterness, flavor, and aroma.
- Fermentation: Transferring the cooled wort to a fermenter and adding yeast to convert sugars into alcohol and carbon dioxide.
- Bottling and carbonation: Priming the beer with sugar or carbonation drops after fermentation is complete, and bottling for conditioning.
All-grain brewing allows homebrewers to experiment with different grains, hops, and yeast strains for unique and flavorful beers. It requires more equipment and time compared to extract brewing, but the result is a beer that reflects the brewer’s personal taste and style.
Essential Equipment for Homebrewing

When diving into the world of homebrewing, having the right equipment is key to mastering the craft. In this section, we’ll uncover the essential tools that every beginner homebrewer should have. From the trusty fermenter to the handy airlock, the brewing kettle, thermometer, and hydrometer, we’ll explore the must-haves to ensure your brewing process goes smoothly. So, let’s get ready to equip ourselves with the essentials and dive into the wonderful world of homebrewing!
1. Fermenter
When it comes to homebrewing, the fermenter plays a vital role. There are several key points to keep in mind:
- Size: It is important to select a fermenter that is suitable for the size of your batch. There are options available ranging from 5 to 10 gallons, with the possibility of smaller or larger sizes.
- Material: Fermenters can be made of either glass or food-grade plastic. Glass fermenters allow you to monitor the fermentation process, while plastic ones are lightweight and less prone to breakage.
- Airtight Seal: It is essential to ensure that your fermenter has a lid or stopper that fits tightly, creating an airtight seal. This prevents oxygen from entering and causing unwanted flavors.
- Airlock: An airlock is designed to fit into the lid or stopper of the fermenter. It allows carbon dioxide to escape while keeping outside air out.
- Cleaning and Sanitization: Proper cleaning and sanitization are crucial for preventing contamination and off-flavors. Thoroughly clean and sanitize the fermenter before each use.
By selecting the right fermenter and maintaining cleanliness, you can create an optimal environment for yeast to convert sugars into alcohol during fermentation, resulting in delicious homebrewed beer.
2. Airlock
An airlock plays a crucial role in the process of homebrewing. It serves as a barrier between the fermenting beer and the outside, allowing carbon dioxide to be released while preventing air or contaminants from entering. Below are the essential steps to follow when using an airlock in homebrewing:
- Ensure proper sanitation of the airlock: It is highly important to thoroughly sanitize the airlock, eliminating any potential bacteria or contaminants that could negatively impact the fermentation process.
- Fill the airlock with sanitizing solution: Fill the airlock halfway with a suitable sanitizing solution, such as diluted bleach or a sanitizer specifically designed for homebrewing purposes.
- Attach the airlock: Insert the airlock stem into the pre-drilled hole on the fermenter lid or bung, ensuring a secure seal to prevent any air from entering or escaping.
- Position the fermenter: Once the airlock is firmly attached, place the fermenter in a location with a consistent temperature to promote steady fermentation.
- Monitor the airlock: Keep an eye on the airlock and observe any bubbling that occurs. This bubbling indicates the production of carbon dioxide during fermentation, signifying an active fermentation process.
- Regularly check for potential issues: Throughout the fermentation process, regularly inspect the airlock for any problems. If the bubbling stops or there are signs of leakage, it could be an indication of fermentation issues or a faulty seal on the fermenter.
The use of an airlock in homebrewing creates a controlled and safe environment for fermentation, guaranteeing the best possible outcome when crafting homemade beer.
3. Brewing Kettle
The brewing kettle is a crucial tool in the process of homebrewing. It plays a vital role during the boiling stage, extracting flavors and sterilizing the wort. Let’s delve into the details of the brewing kettle:
| Features | Description |
|---|---|
| Material | The brewing kettle is typically crafted from either stainless steel or aluminum. Stainless steel is highly durable and resistant to corrosion, while aluminum is lightweight and has excellent heat conductivity. |
| Capacity | The capacity of brewing kettles varies from 5 to 15 gallons. It is important to select the appropriate size based on the desired batch size and ingredients. |
| Heat Source | Brewing kettles can be heated using various methods such as a stovetop, electric heating element, or propane burner. Whatever the heat source may be, it should be capable of bringing the wort to a rolling boil. |
| Additional Features | Some brewing kettles come equipped with extra features like a built-in thermometer, ball valve for convenient wort transfer, and a tangential inlet for whirlpooling. |
| Cleaning and Maintenance | It is crucial to thoroughly clean the brewing kettle after each use to prevent any contamination. Stainless steel kettles can be safely cleaned in a dishwasher, while aluminum kettles require hand washing. |
When considering a brewing kettle, it is essential to take into account the material, capacity, heat source, and any additional features. Choosing the right brewing kettle will ensure a successful brewing process and the creation of delicious homemade beer.
4. Thermometer
A thermometer is an indispensable tool in homebrewing. It plays a crucial role in maintaining the quality and flavor of the final product by ensuring accurate temperature control throughout the brewing process.
| Benefits | Usage | Temperature Range |
| 1. Accurate Temperature Control | Brewers can closely monitor and adjust the temperature during various stages of brewing, including mashing and boiling. This precision aids in extracting flavors from the ingredients and achieving consistent results. | 0-100°C (32-212°F) |
| 2. Timing and Efficiency | Having precise temperature readings helps determine the optimal timeframes for different brewing steps, such as mashing or boiling. This enhances the overall efficiency of the brewing process. | |
| 3. Preventing Off-Flavors | Specific brewing procedures necessitate specific temperature ranges. By using a thermometer, brewers can maintain the recommended temperature ranges, thereby preventing the occurrence of off-flavors in the finished beer. | |
| 4. Precision in Fermentation | During fermentation, maintaining the correct temperature is paramount for yeast activity. A reliable thermometer ensures that the yeast works optimally, resulting in the desired flavors and alcohol content in the beer. |
When choosing a thermometer, it is important to select one that is accurate and easy to read. Digital thermometers, renowned for their precision and convenience, are widely used in homebrewing.
A dependable thermometer is an essential tool for any homebrewer. It allows for better control over the brewing process, ultimately leading to the production of high-quality beer.
5. Hydrometer
A hydrometer is a glass instrument used to measure the specific gravity of beer or other liquids during the brewing process. It helps determine the sugar content of the unfermented beer (wort) and the progress of fermentation.
To use the hydrometer, a sample of the beer or wort is drawn into a hydrometer jar or cylinder. The hydrometer is then inserted into the liquid, and the reading is taken at the point where the surface of the liquid intersects with the scale on the hydrometer.
The scale on the hydrometer is typically marked with numbers from 0.990 to 1.170. The specific gravity reading is taken at the point where the surface of the liquid intersects with the scale.
A hydrometer reading at the beginning of the brewing process provides the original gravity (OG), while a reading taken after fermentation is complete provides the final gravity (FG). The difference between the OG and FG can be used to calculate the alcohol content of the beer.
Ingredients for Homebrewing
Get ready to dive into the fascinating world of homebrewing as we explore the essential ingredients that make it all happen. From the rich, flavorful malted barley to the aromatic hops that add that perfect touch of bitterness, we’ll uncover the key players behind every delicious sip. Don’t forget about the mighty yeast, the microscopic miracle workers responsible for the fermentation process. And of course, we can’t overlook the role of water, the unsung hero that brings it all together. Let’s uncover the secrets of these ingredients and unlock the potential for brewing greatness.
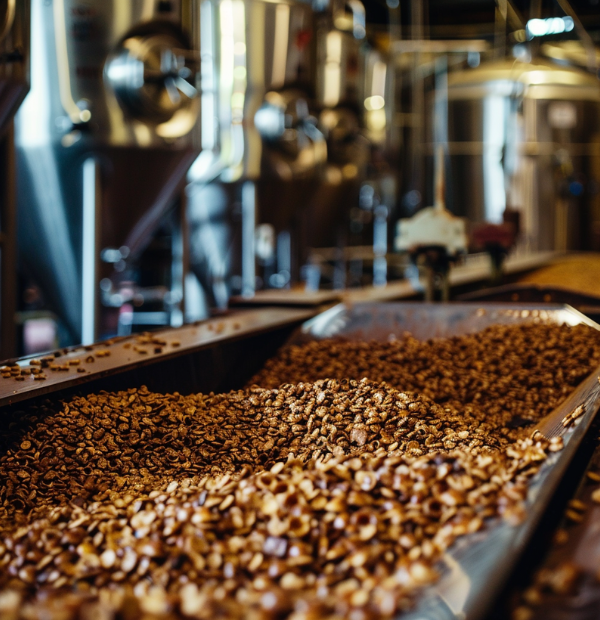
1. Malted Barley
Malted barley is a crucial ingredient in homebrewing as it serves as the main source of fermentable sugars. It undergoes a malting process where enzymes activate in the barley and convert starches into sugars. This conversion is vital for yeast fermentation and the production of alcohol. There are different types of malted barley available, such as pale malt or Munich malt, which offer distinct flavors and colors, allowing brewers to personalize their recipes.
To use malted barley, it needs to be crushed and then mixed with hot water in a process known as mashing. This step breaks down the starches and releases the sugars. The resulting liquid, called wort, is then boiled and combined with hops, yeast, and other ingredients to create beer.
When selecting malted barley for your homebrew, it’s essential to consider the desired flavor and color. Pale malt is a versatile option suitable for many beer styles, while darker malts add complexity and depth. Properly storing malted barley in a cool, dry place is crucial to maintain freshness and achieve optimal brewing results.
Understanding the role and characteristics of malted barley is key for homebrewers to enhance their brewing skills and craft delicious, high-quality beers.
2. Hops
Hops are crucial in the process of homebrewing, as they add flavor, aroma, and bitterness to beer. They play a significant role in providing complexity and balance to the final product. Given below is a table that highlights the different aspects of hops in brewing:
| Aspect | Explanation |
| Flavor | Hops have a substantial impact on the taste of beer, imparting flavors such as citrus, floral, pine, or herbal notes. The specific varieties of hops used have a direct influence on the flavor profile of the beer. |
| Aroma | Hops contribute to the pleasant and distinctive smell of beer. The aroma can range from fruity and tropical to spicy and earthy, depending on the hops used. |
| Bitterness | Hops are responsible for the bitter taste in beer. The level of bitterness is determined by the amount of hops added during the brewing process. The bitterness helps in balancing the sweetness of the malt. |
| Preservation | Hops possess antimicrobial properties that prevent spoilage and extend the shelf life of beer. They inhibit the growth of bacteria and act as natural preservatives. |
Hops can be added at different stages of the homebrewing process. They are added during boiling to extract bitterness and flavor. Towards the end of the boil or during fermentation, hops can be added for aroma. Dry hopping involves directly adding hops to the fermenter to enhance the aroma of the beer.
The quantity of hops used in a recipe varies depending on the desired flavor and bitterness. It is generally measured in ounces or grams per gallon of beer. Different varieties of hops have varying levels of alpha acids, which determine their potential bitterness.
By understanding the role of hops and experimenting with different varieties and quantities, homebrewers can create unique and flavorful beers that cater to their personal preferences.
3. Yeast
| Yeast | Description | Role | Examples |
| Ale Yeast | Top-fermenting yeast that ferments at warmer temperatures (15-24°C). | Produces alcohol and carbon dioxide. Imparts fruity and estery flavors. | Safale US-05, Wyeast 1056, White Labs WLP001 |
| Lager Yeast | Bottom-fermenting yeast that ferments at colder temperatures (7-13°C). | Produces alcohol and carbon dioxide. Imparts clean and crisp flavors. | Saflager W-34/70, Wyeast 2124, White Labs WLP830 |
| Belgian Yeast | Ale yeast used in Belgian-style beers. | Produces alcohol and carbon dioxide. Imparts spicy, fruity, and phenolic flavors. | Safbrew BE-256, Wyeast 3787, White Labs WLP550 |
| Wine Yeast | Selected yeast strains for fermenting wine. | Produces alcohol and carbon dioxide. Impacts aroma and flavor of wine. | Red Star Premier Rouge, Lalvin EC-1118 |
| Wild Yeast/Bacteria | Yeast or bacteria naturally present in the environment. | Can introduce complex and funky flavors, but can also cause off-flavors and infections. | Brettanomyces, Lactobacillus, Pediococcus |
Yeast is crucial in homebrewing as it converts sugars into alcohol and carbon dioxide during fermentation. Different types of yeast significantly impact the flavor and aroma profile of beer. Ale yeast is commonly used for ales, fermenting at warmer temperatures and resulting in fruity and estery flavors. Lager yeast, on the other hand, is used for lagers, fermenting at colder temperatures and producing clean and crisp flavors. Belgian yeast is known for its spicy and phenolic flavors, commonly used in Belgian-style beers. Wine yeast is used specifically for fermenting grapes in winemaking, affecting the aroma and flavor. Lastly, wild yeast and bacteria can introduce complex and funky flavors but should be used with caution as they can also cause off-flavors and infections in beer.
4. Water
Water is an essential ingredient in homebrewing and plays a significant role in determining the final quality of your beer. The table shown below emphasizes the importance and specific functions of water in the homebrewing process:
| Role | Importance |
| 1. Hydrating yeast | Water activates yeast by allowing it to consume sugars and produce alcohol and carbon dioxide during fermentation. |
| 2. Dissolving malt and hops | Water extracts flavors, sugars, and bitterness from malt and hops during the mashing and boiling process. |
| 3. Adjusting pH levels | The pH level of water affects enzymatic activity during the mashing process. Different beer styles require specific pH ranges for optimal enzyme function. |
| 4. Contributing to beer flavor | Water composition, including mineral content, can impact the taste and mouthfeel of beer. Different regions have water with distinct mineral profiles, influencing beer styles like Pilsners, IPAs, or stouts. |
| 5. Ensuring cleanliness | Water is used for sanitization purposes throughout the brewing process, ensuring equipment and fermentation vessels are free from harmful bacteria or wild yeast. |
When selecting water for your homebrewing ventures, it is important to consider its source and mineral content. While tap water is commonly used, it may contain chlorine or other chemicals that can interfere with fermentation. To mitigate these unwanted elements, you can filter tap water or opt for bottled spring water.
Certain beer styles necessitate specific mineral profiles in water. For instance, hop-forward beers such as IPAs benefit from water with higher sulfate content, as it enhances hop bitterness and aroma. On the other hand, malt-forward styles like stouts may require water with lower mineral content to prevent overpowering malt flavors.
Understanding the significance and impact of water in homebrewing is fundamental for creating delicious beer. By selecting the appropriate water and considering its mineral content, you can optimize the brewing process and craft beers that align with your desired flavor profiles.
The Homebrewing Process
Are you ready to dive into the exciting world of homebrewing? We’re about to unravel the secrets of the homebrewing process! From the crucial step of sanitization to the art of mashing, the intense boiling process, the gentle fermentation stage, and finally, the satisfying moment of bottling and carbonation. Get ready to learn the ins and outs of each sub-section, and embark on a journey to create your own delicious brews right at home. Cheers to becoming a homebrewing expert!
1. Sanitization
Sanitization is crucial in homebrewing to ensure the success of your beer. It involves thoroughly cleaning equipment and surfaces that come into contact with the beer to eliminate any potential contaminants that could spoil the brew.
The importance of sanitization cannot be overstated, as it serves multiple purposes. It helps prevent bacterial or microbial contamination, safeguarding the quality of the beer. It creates a clean environment for yeast to thrive, aiding in the fermentation process. Proper sanitization helps maintain the integrity of flavor and aroma, ensuring a delightful drinking experience. It prevents the occurrence of off-flavors and off-odors, which can significantly impact the overall taste of the beer.
There are various methods one can employ to achieve sanitization. Chemical sanitizers, such as iodine or bleach solutions, can effectively eliminate contaminants. Heat sanitization, achieved through boiling or using hot water, provides another reliable option for sterilizing equipment. Utilizing UV light can kill bacteria and microorganisms, offering a convenient sanitization method. High-temperature steam can be applied to effectively sanitize equipment.
When undertaking the sanitization process, it is crucial to adhere to the manufacturer’s instructions for the chosen sanitizing agent or method. It is imperative to handle the equipment and surfaces with clean hands and avoid any form of cross-contamination.
By prioritizing sanitization in the homebrewing process, you can guarantee that your beer remains untainted by unwanted contaminants and achieve a high-quality brew.
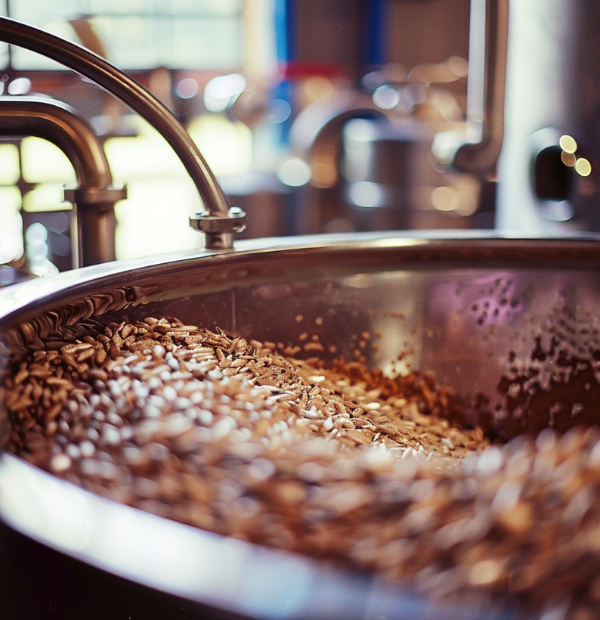
2. Mashing
Mashing is crucial in homebrewing for extracting fermentable sugars from grains. The mashing process involves the following steps:
- Mixing: Heat water to a specific temperature and add it to the mash tun.
- Mashing in: Slowly stir crushed malted barley into the water to prevent clumps.
- Maintain temperature: Close the mash tun and let the mixture rest at around 60-70 degrees Celsius for a certain period of time.
- Saccharification: Enzymes in the malted barley break down complex starches into simpler sugars.
- Mash-out: Increase the temperature to stop enzyme activity and prepare for lautering.
- Lautering: Separate the liquid wort from the spent grain, with the grain bed acting as a filter.
- Sparging: Rinse the grain bed with hot water to remove any remaining sugars.
- Testing: Use a hydrometer to measure the wort’s specific gravity and determine its sugar content, indicating the potential alcohol level.
Following these steps allows homebrewers to extract necessary sugars from grains. The sugars can then be fermented by adding yeast to produce alcohol and create flavorful beer.
3. Boiling
- Boiling plays a crucial role in the process of homebrewing. It is responsible for extracting flavors, aromas, and sanitizing the wort. Here’s a step-by-step guide on how to properly boil your homebrew:
- Heat the wort: Begin by transferring the mash into a brewing kettle and commence the heating process.
- Bring to a boil: Gradually increase the heat until the wort reaches its boiling point.
- Add hops: Follow the recipe and introduce the hops into the boiling wort. Hops contribute bitterness, flavor, and aroma to the beer.
- Boil duration: Stick to the specified duration mentioned in the recipe, as it can vary from as short as 30 minutes to over an hour.
- Skim off impurities: To maintain the clarity of the beer, use a sanitized spoon to remove any foam or impurities that appear on the surface.
- Add other ingredients: Depending on the recipe, you may need to add spices, fruit, or other flavorings during the boiling process, as instructed.
- Cooling: Once the boiling is complete, it is important to cool the wort rapidly to room temperature. This can be achieved by using an immersion chiller or an ice bath.
4. Fermentation
Fermentation is a crucial process in the art of homebrewing. It plays a vital role in converting the sugar present in the wort into both alcohol and carbon dioxide through the action of yeast. Understanding and mastering this process is essential in order to produce beer of superior quality.
Throughout the process of fermentation, yeast consumes the sugars present and produces alcohol and carbon dioxide as byproducts. To facilitate this process, a specially designed vessel known as a fermenter is used. It is crucial for the fermenter to be airtight and equipped with an airlock, to allow the carbon dioxide to escape without allowing any oxygen to enter.
Maintaining a specific temperature is a critical factor in the fermentation process. Different beer styles require different temperature ranges to achieve the desired flavors. The recommended temperature range is typically between 64-72°F (18-22°C), although it may vary depending on the type of yeast strain and the beer style being brewed.
The duration of fermentation generally lasts for one to two weeks, but this timeline may be shorter or longer depending on the specific yeast strain and recipe being used. It is of utmost importance to closely monitor the fermentation process by regularly checking the specific gravity using a hydrometer. This ensures that the fermentation is progressing correctly and successfully.
Once the fermentation process is complete, the beer is now prepared for the bottling or kegging stage. Carbonation can occur naturally through a process called bottle conditioning, which involves adding a small quantity of sugar to each bottle. Alternatively, a keg system can be utilized to force-carbonate the beer.
Incorporated
5. Bottling and Carbonation
To bottle and carbonate your homebrewed beer, follow these steps:
- Clean and sanitize bottles: Wash bottles with a mild detergent and rinse well. Sanitize with brewing sanitizer to remove potential contaminants.
- Add priming sugar: Calculate the appropriate amount of priming sugar based on the volume of your beer. Dissolve the sugar in boiling water, and then add it to the bottling bucket.
- Siphon the beer: Transfer the beer from the fermenter to the bottling bucket using a siphoning tube, ensuring to avoid any oxygen exposure.
- Bottle your beer: Attach a bottling wand to the spigot of the bottling bucket. Fill each bottle, leaving about an inch of headspace to allow for carbonation.
- Cap the bottles: Securely tighten the bottle caps to ensure a tight seal.
- Store the bottles: Place the sealed bottles in a cool and dark location with a temperature around 70°F (21°C) to allow for yeast fermentation and carbonation.
- Wait for carbonation: Carbonation typically takes 1 to 2 weeks, but the exact time may vary. You can check the carbonation level by opening a bottle and tasting the beer.
- Enjoy your homebrew: Once you achieve your desired level of carbonation, make sure to chill the bottles before serving for an enhanced drinking experience.
By following these steps, you will properly achieve bottling and carbonation for your homebrewed beer. Remember to be patient and allow sufficient time for natural carbonation. Happy brewing!
Troubleshooting Common Homebrewing Issues

Photo Credits: Www.Moderngentlemanmagazine.Com by Thomas Jones
When homebrewing, encountering common issues is not uncommon. To troubleshoot these problems, follow these steps:
- Inconsistent fermentation: Check the brew’s temperature to make sure it falls within the recommended range for the yeast being used. Temperature fluctuations can lead to inconsistent fermentation.
- Off-flavors: Improper sanitization, contamination, or poor yeast health can cause off-flavors. Thoroughly sanitize all equipment and fermenters to prevent contamination. Also, ensure that the yeast is healthy and active before pitching.
- 3Low carbonation: If the beer lacks carbonation, check the sugar content in the priming solution. It’s possible that not enough sugar was added for carbonation. Adjust the sugar amount accordingly for future batches.
- Cloudy beer: Incomplete fermentation or poor clarity agents can result in cloudy beer. Allow enough time for the beer to fully ferment and clarify. Consider using clarifying agents like Irish moss or gelatin to improve clarity.
- High alcohol content: If the beer has a higher alcohol content than intended, double-check the recipe and ensure accurate ingredient measurements. Monitor specific gravity readings throughout the brewing process for proper fermentation and alcohol content.
- Gushing bottles: Gushing bottles occur when there is excessive carbonation in the beer. This can be caused by overpriming or incomplete fermentation. Follow the recommended priming sugar amounts and allow sufficient time for full fermentation before bottling.
Remember, troubleshooting common homebrewing issues is an essential part of the learning process. By identifying and addressing these issues, you can improve your homebrewing skills and create delicious beers.
Tips for Successful Homebrewing

- For successful homebrewing, it is essential to sanitize everything. Before brewing, make sure to clean and sanitize all equipment to prevent contamination and off-flavors in your beer.
- To enhance the flavor and aroma of your beer, be sure to select quality ingredients. Opt for fresh and high-quality malt, hops, yeast, and water.
- Accurate recipe following is key. Pay close attention to ingredient quantities, mash temperatures, and fermentation times specified in the recipe.
- Proper fermentation temperatures should be maintained. Control the fermentation temperature within the recommended range for the specific style of beer being brewed. This is crucial to avoid off-flavors and ensure proper yeast activity.
- Patience is essential in the homebrewing process. Allow sufficient time for fermentation, conditioning, and carbonation. Rushing the process can result in subpar beer.
- Monitoring and recording are important. Keep a detailed log of the brewing process in order to identify improvements for future batches.
- Seeking feedback is beneficial. Share your homebrew with friends, family, or fellow homebrewers to gather input and refine your techniques, ultimately improving the quality of your beer.
- Don’t be afraid to experiment and have fun! Embrace creativity by trying out new recipes, beer styles, or techniques in the world of homebrewing.
Frequently Asked Questions
What are some tips and tricks for beginning homebrewers?
Some tips and tricks for beginning homebrewers include always having a backup yeast sachet, starting with simple recipes, using ingredients in moderation, paying attention to water quality, visiting a homebrew shop for advice, measuring vessel volumes, monitoring fermentation temperature, learning to taste critically, and getting information from reliable sources.
Where can I find a comprehensive guide for homebrewing from beginner to advanced?
You can find a comprehensive guide for homebrewing from beginner to advanced on the Beer and Brewing website. They offer a 13-page illustrated guide that covers various topics related to homebrewing. You can download the guide for more information.
What are the key considerations when selecting a brew kettle?
When selecting a brew kettle, size is a key consideration. It is important to choose a kettle that can accommodate the desired batch sizes for your brewing experience. Some brewers recommend getting a larger kettle to allow for larger batch sizes in the future.
Why is rapidly cooling wort important in the brewing process?
Rapidly cooling wort is important to prevent contamination and achieve clearer beer. By cooling the wort quickly, you can minimize the risk of unwanted microorganisms affecting the fermentation and improve the clarity of your final beer.
What is the purpose of using an auto-siphon in homebrewing?
An auto-siphon is used for transferring beer between containers during the brewing process. It provides a convenient and efficient way to move beer without introducing excessive oxygen or risking contamination.
How can I make the bottling process easier in homebrewing?
One way to make the bottling process easier is by using a dishwasher. Dishwashers can be utilized for bottling, making it more efficient and less time-consuming. It provides a convenient way to sanitize bottles and simplify the overall bottling process.